Getting started with Fedora QA Series 1 Part 2
This post will help you get started with QA and how you can get recognized in the community for your time , dedication and work.
** Make sure that you have a Bugzilla,FAS and email alias set up before to follow the steps below.If you haven't , you can find it here .
Bodhi
Its a web based tool you will use to push your packages to the Fedora repositories as an update, first an update to be tested (repository: updates-testing) then a stable update (repository: updates). Bodhi is also equipped with a fairly extensive test suite.This is the easiest way to start contributing even if you are very new to Fedora and Fedora QA.
Let's start
First of all, you need to remember that it's highly recommended to test in VM and not on your primary OS. As the pre-alpha,alpha and beta images are often buggy and not refined, its suggested that you test it on VM before installing any of those as primary.
All the images of Fedora for all major architectures can be downloaded here
Setting up the Testing EnvironmentAfter your download is complete, you can set up your image as a VM. Here is how you do it.
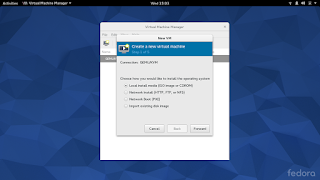
 This is Virtual Machine manager, you can get it from "Software" . Here we will be set up a VM which will be booting up the image which we have just downloaded.
Select the ISO as your source by going to File --> New Virtual Machine--> Local Install Media(ISO or CD ROM)
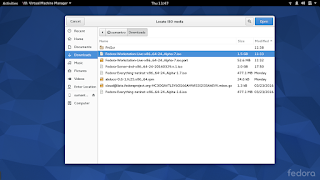
Select the source of the .iso file by going to browse selecting the media which you want to boot.
 I have selected the F24 Workstation Image for x86_x64 arch.
 Make sure you check the .iso file
Input the amount of RAM and CPUs which you want to allocate to this VM.
By default its 20GB. It's recommended to stick to it. Always make sure that you check "Enable storage for this VM"
Give your VM a name and make sure your network setting are set to NAT
After this the VM will be created and it will automatically boot up.
Now ,we need to set up Fedora. When it boots up the first time it will prompt for "Install on Hard Drive" and "Try it", it recommended to install it.
Only couple steps are very important which is to select the 20GB volume which we just allocated for the VM. Also to set up the root password and user password.
After installation in over , you will be prompted for a reboot!
After you reboot you will prompted to set up your language and input settings.
Once you are done, you can open up "Terminal" where we will be doing the rest of the steps.
This is the test environment where we will be carrying out the tests, but before that we need to update the test packages.
Enabling the update-testing repositories permanently
Open terminal and type in "su" which stands for superuser and enter the root password which you have set during installationExecute dnf config-manager --set-enabled updates-testing
and
dnf update --enablerepo=updates-testing
**the last syntax will take a bit of time to execute depending on your internet speed.
As you can see its downloading all the new update packages.
Now you are all set to go
Lets start with Bodhi
Note: make sure you have your fedoraproject.org alias set up!
Lets get familiar with Bodhi interface.

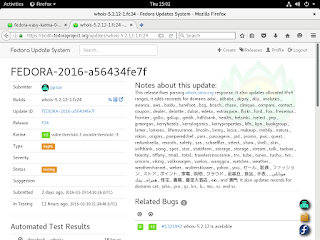
When you log in to Bodhi you can see a bunch of critical path test and general functionality test on the right side.I have taken up one example here.
The rule here is to run the packages and test cases and give "karma as +1 or -1" .The plus indicated the package is stable and is working fine with no regression noted.Although,unless this update is really hampering the performance of system or not at all performing ,it's recommended not to give "-1".Once you are logged in to the site you will be getting all the notif about the people who are pushing packages for testing.
Taken and tested

I took a package and tested . It got installed good and here is how I reported it back.
What is it for you ,if you are a testing?
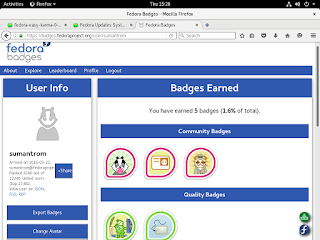
You get badges and you can show them off to prove that you have been giving your precious time and energy testing Fedora.
Here is how it looks:
Go to : https://badges.fedoraproject.org/
Login with your credentials and you will see the badges you have earned .
Subscribe to our mailing list AND interact with the global community on IRC
Thanks for reading!


Comments
Post a Comment